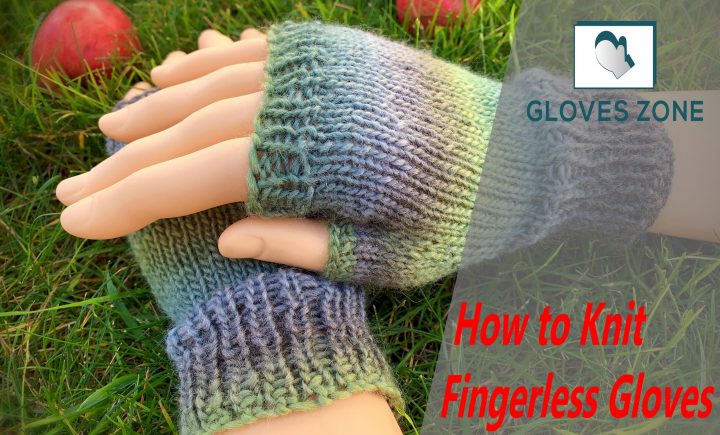
There are a few different ways to knit fingerless gloves. You can either use the magic loop method, or you can use double-pointed needles.
I’m going to show you how to do it with double-0pointed needles.
Measure your size

Measure around your hand at the knuckles and write down the measurement. You don’t need to include your thumb in this measurement, just measure around all of your fingers including your thumb if it fits.
I always cast on over my index finger so that later when I’m knitting around towards my palm, it’s easier to switch to long double-pointed needles and knit around towards my thumb.
Materials
- 1 skein of worsted weight yarn (I like to use acrylic because you don’t need to worry about it stretching or changing shape)
- Double pointed knitting needles (for this pattern, we’re going to use size 7 US/4.5mm double pointing needles)
- Scissors
Gauge
In the first round, you want to cast on about 7 stitches for every inch.
So if your hand is 8 inches around, cast on 56 stitches (8 x 7 = 56). If it’s really stretchy and loose-knit another 2 or 3 rounds with this number of stitches.
If it’s not quite as loose, continue with this number of stitches. You can always decrease or increase your gauge after you’ve finished the gloves to make them looser or tighter if needed.
You should now have 28 stitches on each side.
How to cast on the stitches

Here’s how to do it with double-pointed needles:
Knit body
- Knit both stitches on the first needle. On your second needle, knit 1 stitch from the front of the first needle and 1 from behind it, as if to knit 2 stitches together. Knit those two stitches as one.
- Knit First Round. *K2, P2* Repeat this across all 4 needles for one round. This forms a ribbing. Do not join or turn in your work. You will be working in an oval.
- Continue to knit every row like this by knitting around in the front and the back, forming a ribbing of K2, P2 for 6 more rounds.
- On this round, you are going to work the same way with the *K2, P2* pattern, but instead of working in knit loops on the right side, you are going to knit through the back loop (Ktbl).
- This gives you a ridge of *P2, K2* when you’re finished.
- Knit 6 more rows in this pattern without turning your work or join. You should now have 12 ridges of ribbing in total (6 ridges on both the right and wrong sides).
The thumb hole
- *K2, P2tog* Repeat this across all 4 needles. On the next round, you will knit around in *P2, K2*. This is your thumb hole.
- This forms a diagonal line of decreases that goes from the tip of your little finger to just before the base of your thumb.
- You now have 28 stitches on each side (56 total)
- Knit Evenly for 10 Rounds
- Here you will start knitting in a straight line, forming an oval as before. You will be working stockinette stitch with no ribbing.
- You do not need to increase or decrease at this point. Just knit around evenly until your work measures 10 inches from the tip of your little finger to just before the base of your thumb.
The palm
- This part forms a triangle which you will later sew up into a mitten shape. Note that only one side is worked in stockinette stitch. The other side has decreased at each edge to form the triangle shape.
- Knit 1, *P2tog* Repeat across all 4 needles. On the next round, you will knit around in *K2, P2*. This forms a diagonal line of decreases from the base of your thumb to about halfway between the tip of your middle finger and the base of your little finger.
- Knit even for 2 more rounds
- Here you will start another decrease along the sides of your mitten. This time it’s a diagonal line going from the base of your little finger to just before the tip of your index finger.
- K2tog around for 2 rounds
- Decrease evenly on this round by knitting all stitches together as one using a knit-2-together (K2tog) technique.
- Cut the yarn leaving a long tail and pull it through the remaining stitches like a drawstring. Weave in your loose ends and trim them off close to your work.
Note: It is not necessary to count every single stitch on every round as you knit. Just keep knitting around evenly until it looks about right. Try on the mitten as you go to make sure it’s coming out at the right size.
Additional Tips
- If you don’t want to work your thumb hole with double-pointed needles, you can use a short circular needle instead. I prefer dpns for this task, though, because they are shorter and easier to manage.
- You can also use a circular needle to knit the palm of your mitten, switching to double-pointed needles when you get back to working in the round again.
- Just make sure that if you do this, you switch back to using circulars for the thumb hole later on and for any fingers that may be added (if you choose to make fingerless gloves).
- If you want to work your mitts with only one color, but would like the space between the first and last stitches of each row to be white (for a neat look), just slip the first stitch on all odd rounds and purl it on all even rounds. This makes a nice, unnoticeable jog in the pattern.

I am not a good blogger but I started blogging when I was in my college. one day scrolling my social media pages and top of the page one notification was coming like this “ earn money from blogging”.then I clicked that notification. After that, I was confused that which niche is better for me. Finally, I selected the niche and I was comfortable with that glove’s reviewer.

